Follow Me On Social Media!

No-Knead Dill Gouda Artisan Bread: Effortlessly Divine Flavor
Introduction to No-Knead Dill Gouda Artisan Bread
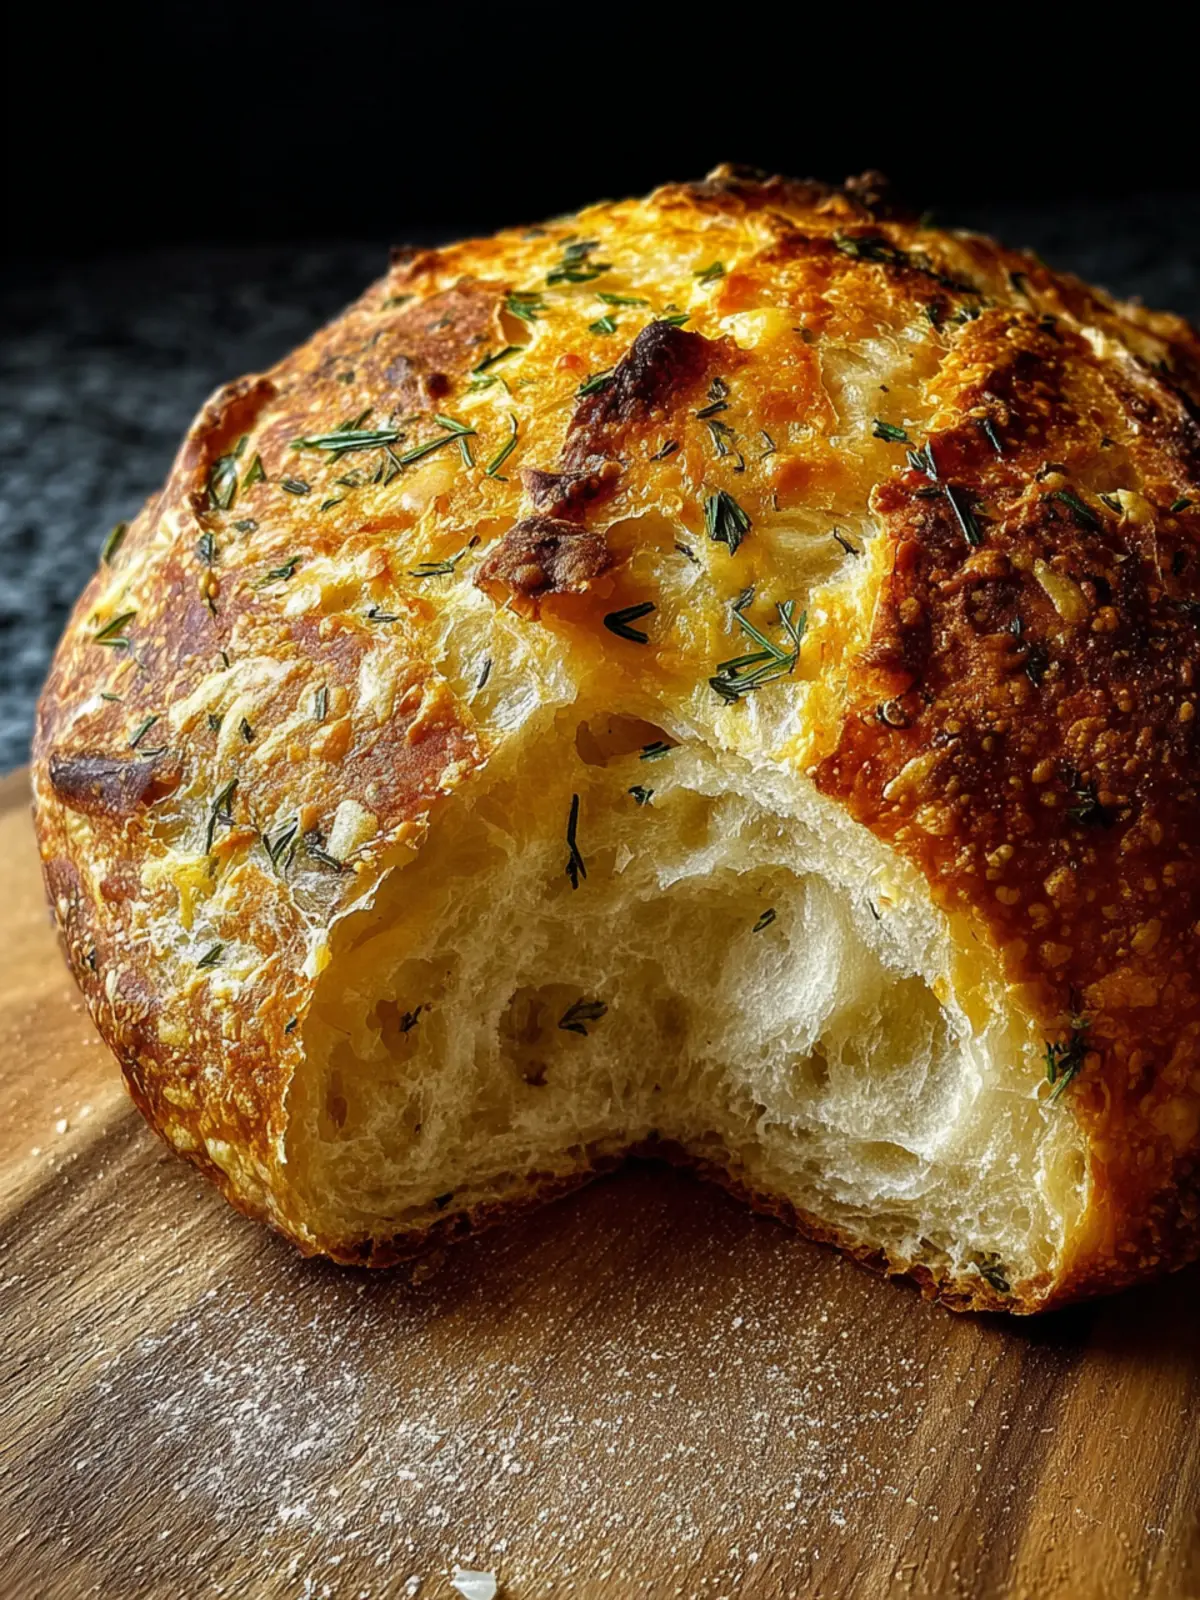
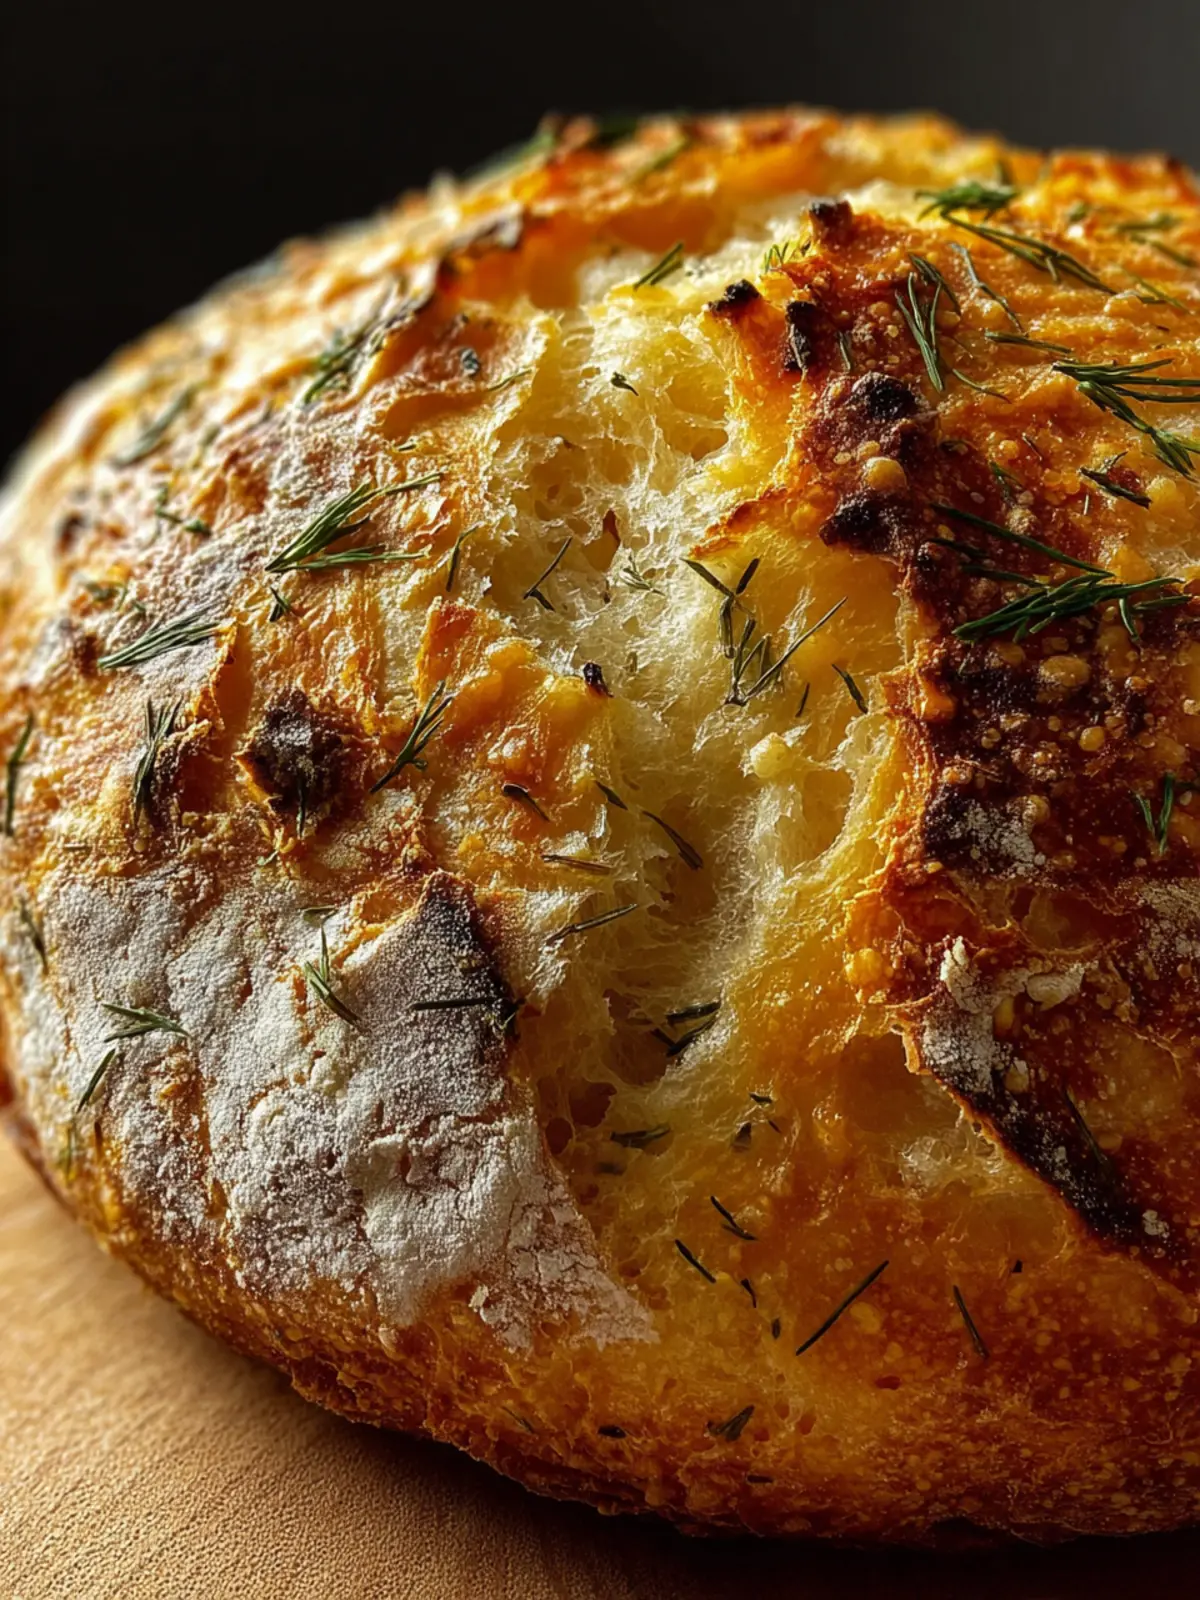
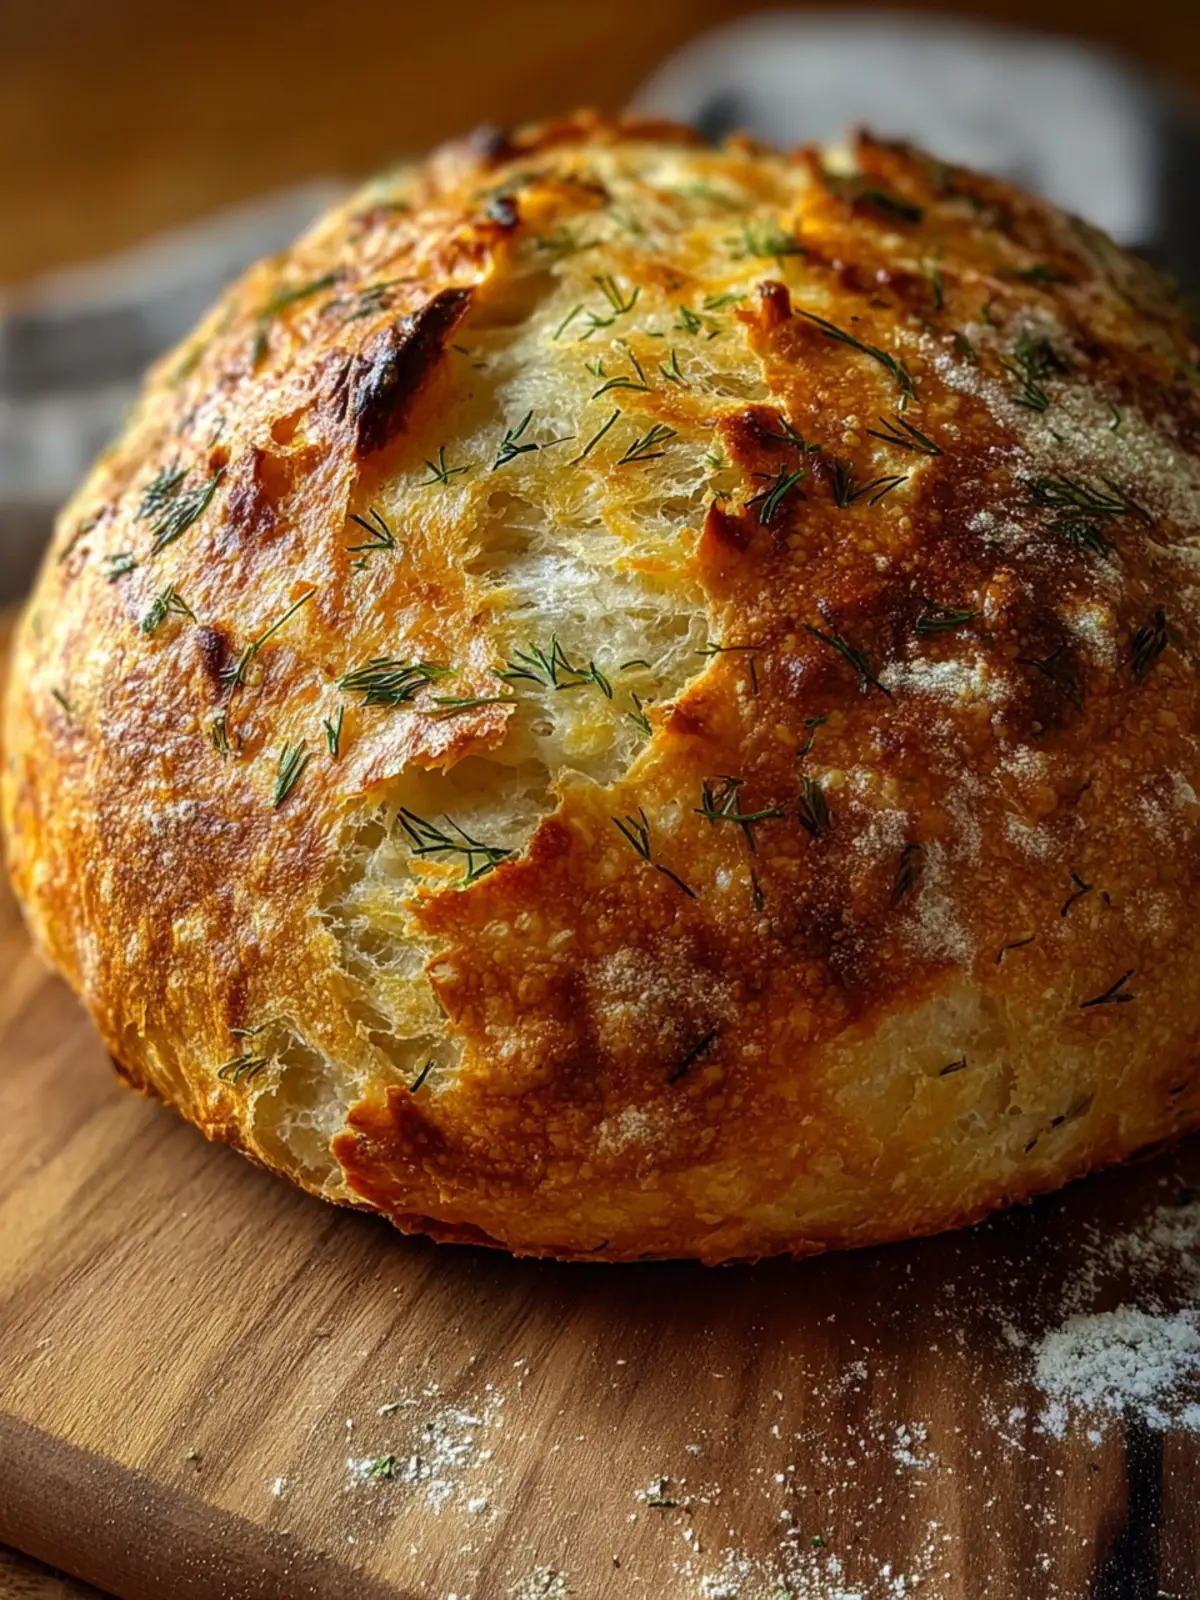
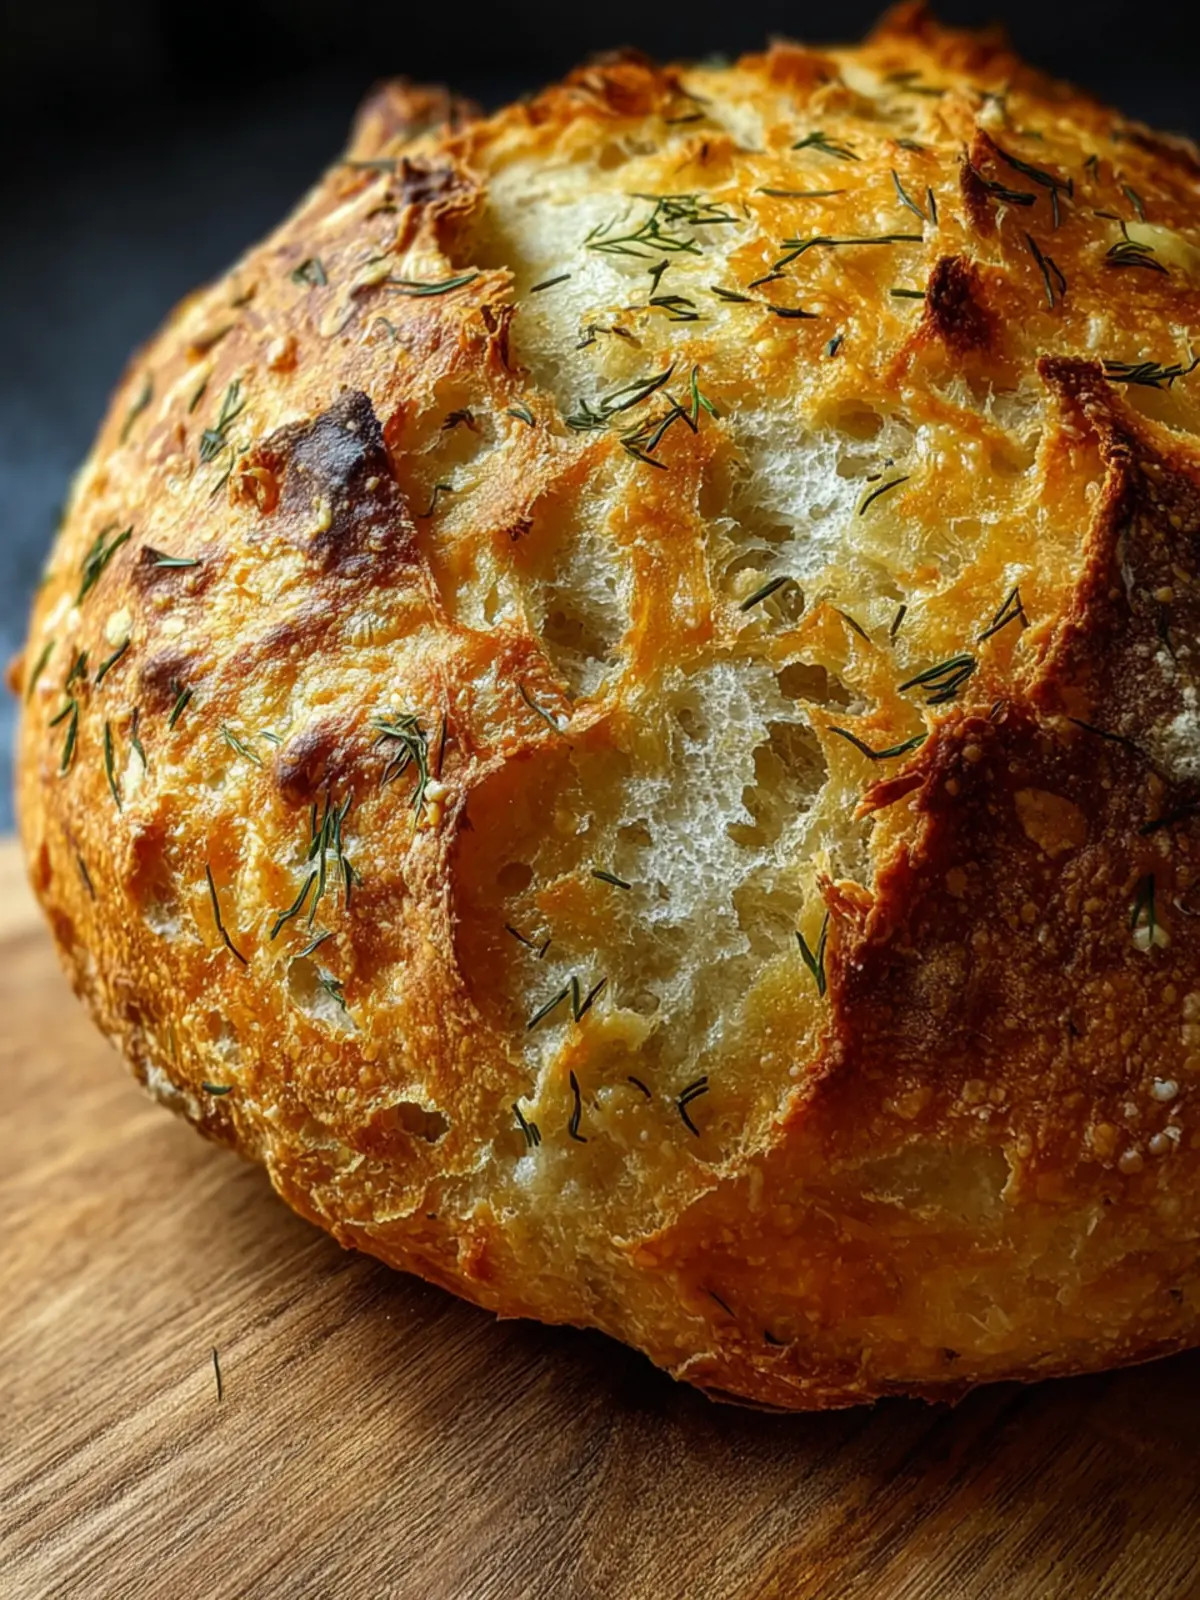
Imagine walking into a cozy kitchen, the aroma of freshly baked bread wafting through the air. This is the enchanting experience you get with No-Knead Dill Gouda Artisan Bread, a delightfully simple recipe that yields a crusty exterior and a soft, cheesy interior. What sets this bread apart is not only its unique flavor but also its effortless preparation process. By eliminating the need for kneading, you can easily incorporate wonderful ingredients like savory dill and creamy Gouda cheese into your creations, resulting in a bread that will impress your friends and family.
What Makes No-Knead Dill Gouda Artisan Bread So Special?
This no-knead dill Gouda artisan bread is special for several reasons:
-
Simplicity: The beauty of this recipe lies in its minimal effort. It requires no extensive hand-kneading, which means you can enjoy the process without the workout. Simply mix your ingredients and let time work its magic.
-
Flavor Profile: The combination of fresh dill and Gouda cheese is a match made in culinary heaven. Dill adds a refreshing earthy taste, while Gouda provides a nutty, creamy richness, making each slice a delight for the palate.
-
Texture: The slow fermentation process creates a perfect airy texture, while the high hydration dough ensures a crispy crust that contrasts beautifully with the chewy inside.
-
Versatility: This artisan bread can be enjoyed in various ways—whether slathered with butter, paired with your favorite soup, or as the star of a gourmet sandwich. Its unique flavor makes it an excellent addition to any meal.
-
Homemade Happiness: Baking this bread at home gives you a sense of accomplishment and warmth. It’s a fantastic way to engage friends or family in the kitchen, creating memories over a shared love of food.
With just a handful of ingredients and a little patience, you can elevate your baking game with No-Knead Dill Gouda Artisan Bread. Ready to get started? Let’s explore the ingredients that make this recipe a winner!
Key Ingredients for No-Knead Dill Gouda Artisan Bread
Creating a loaf of no-knead dill gouda artisan bread is not just about the process—it’s about the delightful visuals and enticing aromas that fill your home. Each ingredient plays a distinct role, weaving together a tapestry of flavors that will transform your kitchen experience.
-
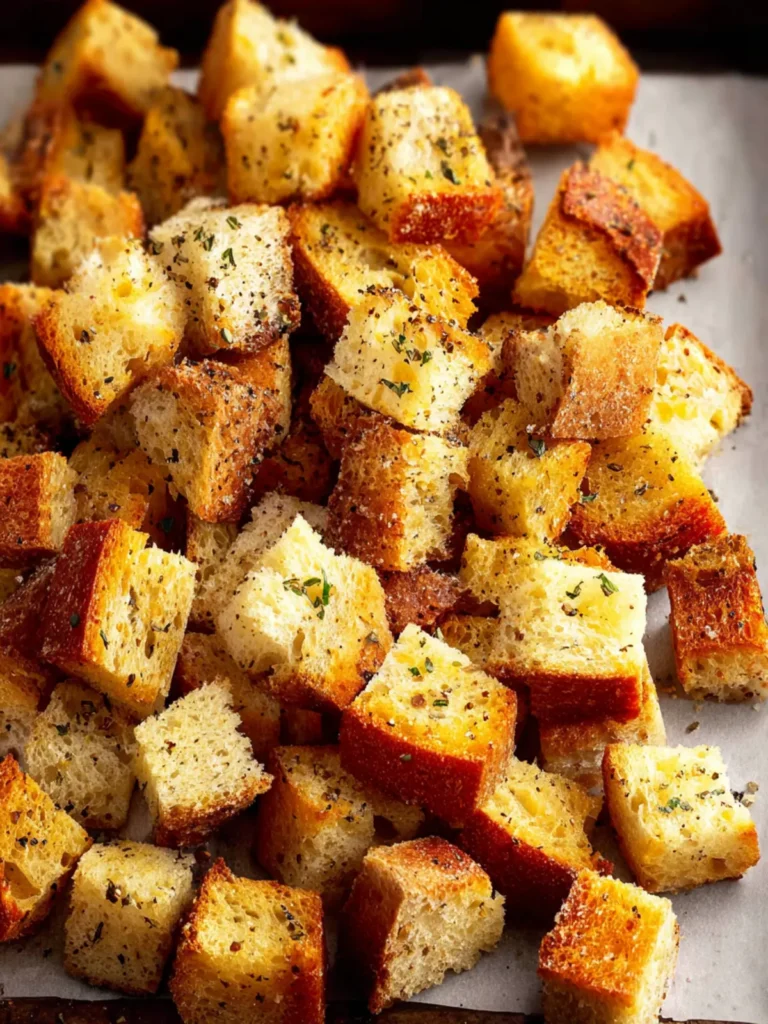
Flour: I recommend using bread flour for this recipe. Its higher protein content gives the bread a beautiful, chewy texture that you won’t achieve with all-purpose flour. However, if bread flour isn’t at hand, all-purpose flour can work in a pinch.
-
Water: Warm water is crucial in activating the yeast. Make sure it’s comfortably warm, not hot, to encourage proper fermentation without killing the yeast.
-
Dill: Fresh dill is the star of this recipe. Its vibrant green color and fragrant aroma truly elevate the bread. If fresh isn’t available, you can use dried dill, but the flavor won’t be as bright.
-
Gouda Cheese: Aged gouda provides a rich, nutty flavor that’s irresistible when melted. Shredded gouda will blend seamlessly into the dough, making every bite delightful.
-
Salt: I use sea salt for its flavors and texture. It balances the richness of the gouda and the earthiness of the dill, ensuring each bite is perfectly seasoned.
This combination of ingredients creates a loaf that’s not only visually stunning but also bursts with flavor, making it a delightful addition to any meal or a cozy snack on its own.
Why You’ll Love This Recipe
When you indulge in no-knead dill gouda artisan bread, you’re not just baking; you’re crafting an experience that brings irresistible warmth and comfort right to your kitchen. Imagine the aroma of freshly baked bread wafting through your home, instantly elevating your day.
Simplicity Meets Flavor
-
Effortless Preparation: If you’ve ever felt daunted by the thought of baking bread from scratch, this recipe is a game-changer. With no kneading required, you can mix the ingredients in minutes and let time do the hard work for you.
-
Gourmet Taste: The combination of dill and gouda creates a rich and savory flavor profile that is sure to impress. It’s like taking a gourmet bakery experience and bringing it into your home.
Perfect Pairing for Any Occasion
Whether you’re hosting a cozy dinner party or enjoying a quiet weekend at home, this no-knead dill gouda artisan bread is the ideal companion. Serve it warm with butter or alongside a hearty soup, and you’ll be met with compliments and requests for seconds.
In a world where convenience often trumps quality, this bread manages to offer both. With just a few simple ingredients, you can create something beautiful and delicious—perfect for both seasoned bakers and beginners alike. So go ahead, give this recipe a try and experience the joy of homemade bread!
Variations of No-Knead Dill Gouda Artisan Bread
Exploring the world of no-knead dill gouda artisan bread brings to life a delightful array of variations that will keep your bread-baking journey exciting. With just a simple twist on the base recipe, you can create distinct flavors and textures that cater to different palates.
Infused with Garlic
For those who crave a more robust flavor, adding minced garlic can elevate your bread to new heights. Simply incorporate a few cloves into the dough during mixing for a savory touch that pairs wonderfully with the dill and gouda.
Spinach and Feta
Looking for a Mediterranean spin? Toss in some fresh spinach and crumbled feta cheese. The earthy spinach and tangy feta complement the creamy gouda, creating a delightful fusion of flavors.
Sweet and Savory
For a unique blend, consider incorporating dried cranberries or apricots along with a sprinkle of walnuts. This sweet component balances the rich gouda, making each bite a delightful surprise, perfect for a cheese platter.
Whole Wheat Twist
To add some whole grains to your bread, swap out half of the all-purpose flour with whole wheat flour. This addition not only enriches the bread’s texture but also enhances its nutritional profile.
Seasoned Cheddar Variation
Lastly, try substituting gouda with aged cheddar for a sharper flavor. The unmistakable bite of cheddar will create a bread that stands out perfectly on its own or as an accompaniment to your favorite dishes.
With these variations, you’re not just baking bread; you’re crafting personalized experiences that can fit any occasion. Happy baking!
Cooking Tips and Notes for No-Knead Dill Gouda Artisan Bread
Baking no-knead dill gouda artisan bread is not just about following a recipe; it’s a delightful experience that turns your kitchen into a fragrant haven. The beauty of this bread lies in its simplicity, allowing the flavors of dill and Gouda to shine through without too much fuss.
Embrace the Time
One of the first keys to mastering no-knead bread is to appreciate the long fermentation process. Allowing your dough to rest for 12 to 18 hours not only enhances the flavor but also improves the texture. This means more time for you to relax or tackle that Netflix series you’ve been meaning to start.
Flour Matters
For our dill gouda artisan bread, using high-quality all-purpose flour is essential. Feel free to experiment a bit! A portion of whole wheat flour can add an earthy depth, while bread flour can provide a chewier texture, perfect for holding those Gouda chunks.
Mix it Up
When incorporating your ingredients, aim for a well-mixed batter without overworking it. You want it to be shaggy and sticky; this is the signature of our no-knead method! Trust the science behind gluten development that happens during the long rise.
Handle with Care
After the initial proof, when shaping your dough, be gentle. The goal is to keep as much air in the dough as possible. This air will help your dill gouda artisan bread rise beautifully in the oven.
The Perfect Bake
Lastly, get comfortable with your oven! Position a Dutch oven inside for pre-heating; this traps steam and creates that crispy crust we all crave. Don’t be shy about using parchment paper for easy transfer and cleanup!
By following these tips and allowing your creativity to flow, you’ll be well on your way to baking a loaf of no-knead dill gouda artisan bread that’s sure to impress your family and friends. Happy baking!
Serving Suggestions for No-Knead Dill Gouda Artisan Bread
Baking a loaf of no-knead dill gouda artisan bread opens up a world of delightful serving possibilities that elevate your dining experience. Picture yourself hosting friends or simply enjoying a cozy dinner at home; this bread is a charming companion.
Pairing with Savory Dishes
This bread beautifully complements a variety of savory dishes. Consider serving slices with:
- Cheese and Charcuterie Board: The dill and gouda flavors make it a standout on a cheese platter alongside prosciutto, salami, or an assortment of cheeses.
- Soups and Stews: A warm bowl of tomato bisque or hearty vegetable stew? Dipping a slice of no-knead dill gouda artisan bread adds depth and texture to the meal.
Ideal for Sandwiches
Why not turn this artisan bread into something even more delightful? Use it as the base for:
- Gourmet Sandwiches: Layer with turkey, fresh greens, and a tangy mustard or aioli for a lunchtime treat.
- Open-Faced Sandwiches: Top with cream cheese, smoked salmon, and a sprinkle of dill for a refreshing snack or appetizer.
Enjoy with Spreads
For a quick and satisfying bite:
- Herbed Butter or Cream Cheese Spread: Spread generously and enjoy a delightful mouthful, perfect for a light snack or breakfast.
With these suggestions, your no-knead dill gouda artisan bread will undoubtedly shine in any meal setting!
Time Breakdown for No-Knead Dill Gouda Artisan Bread
Understanding the time commitment for making no-knead dill gouda artisan bread can help you plan your baking day effectively. This effortless bread will soon become a staple in your home!
Preparation time
This engaging recipe requires about 15 minutes of preparation. You’ll combine a handful of basic ingredients and mix them together. It’s straightforward and perfect for busy schedules!
Rising time
The dough’s magic happens during the rising phase, which takes approximately 12 to 18 hours. Cover it with a clean towel, let it rest, and enjoy the anticipation of delightful aromas filling your kitchen.
Baking time
Once the dough has risen, pop it in the oven for about 30 to 40 minutes. This is when your no-knead dill gouda artisan bread transforms into a golden, crusty masterpiece.
Total time
By adding the preparation, rising, and baking times together, you’ll dedicate a total of around 13 to 19 hours to this bread. While it may seem lengthy, most of that time is simply letting the dough do its thing!
Nutritional Facts for No-Knead Dill Gouda Artisan Bread
Bringing a touch of gourmet to your kitchen, no-knead dill gouda artisan bread not only delivers on flavor but also provides some essential nutritional benefits. Here’s a breakdown of what this delightful bread offers:
Calories
A serving of this artisan bread contains approximately 200 calories, making it a satisfying yet light choice for any meal.
Protein
With around 8 grams of protein per serving, this bread helps keep you feeling full and energized throughout the day.
Fat
This recipe boasts about 7 grams of fat, primarily from the gouda cheese, delivering creamy richness and flavor.
Carbohydrates
The bread has around 30 grams of carbohydrates, providing a good source of energy, perfect for your busy lifestyle.
Fiber
Each serving includes about 2 grams of fiber, supporting digestion and contributing to overall gut health.
Sodium
With approximately 300 milligrams of sodium per serving, it’s a flavorful addition to your diet without being overly salty.
Embrace the wholesome benefits of no-knead dill gouda artisan bread in your meals, and enjoy the delightful taste and textures it brings to your table!
FAQ about No-Knead Dill Gouda Artisan Bread
Baking your own no-knead dill Gouda artisan bread can be an incredibly rewarding experience, but questions often arise during the process. Whether you’re a novice or a seasoned baker, here are some common inquiries that may help guide your baking journey.
Adjusting the Gouda Amount
If you’re a huge fan of Gouda, feel free to increase the amount! Just remember that too much cheese can affect the dough consistency, so aim to keep it within an additional 1/2 cup. This ensures a cheesy flavor without compromising texture.
Swapping the Cheese
While Gouda adds a unique creaminess and flavor, you can definitely explore other cheeses! Cheddar, Monterey Jack, or even feta would work well. Just be aware that different cheeses will alter the taste profile—experiment based on your preference.
Storing Leftovers
After enjoying your delicious no-knead dill Gouda artisan bread, store any leftovers in an airtight container at room temperature for up to three days. For longer storage, slice the bread, wrap it in plastic wrap, and freeze for up to three months.
Troubleshooting Dough Rise
If your dough isn’t rising, ensure your yeast is fresh. Additionally, verify that the room temperature is warm enough, around 70-75°F. If you’ve done both and are still struggling, consider extending the resting time to allow more fermentation.
Using Different Pots
You can certainly use another type of pot! Cast iron Dutch ovens are recommended for the best crispy crust, but if you have a stoneware or heavy metal pot, that can work too. Just make sure it has a lid to trap steam and promote that artisan crust.
With these tips, you’re well on your way to mastering no-knead dill Gouda artisan bread. Happy baking!
Conclusion on No-Knead Dill Gouda Artisan Bread
In wrapping up our no-knead dill gouda artisan bread journey, I can’t stress enough how rewarding this simple method can be. The combination of fresh dill and creamy gouda brings a delightful twist to traditional bread making. The best part? It really is hands-off! With just a little time and patience, you’ll embrace the charming aroma of freshly baked bread wafting through your home.
What’s more, this bread pairs beautifully with soups, salads, or even as a base for sandwiches. So, gather your ingredients and get ready to impress both yourself and your guests with this effortless artisan masterpiece. Happy baking!
Print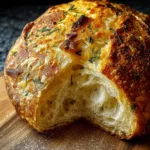
Gouda Dill Bread
- Total Time: 9 hours
- Yield: 1 loaf 1x
Description
A delicious bread infused with Gouda cheese and fresh dill.
Ingredients
Scale
- 1½ cups water, room temperature (at or near 70°F/21°C)
- 1 teaspoon active dry yeast
- 3½ cups bread flour, plus more for dusting
- 1 teaspoon kosher or fine sea salt
- ½ teaspoon freshly ground black pepper
- 2 tablespoons fresh dill, finely chopped
- 1 cup cubed Gouda cheese
Instructions
- Add the yeast to the water and let it sit for 10-15 minutes.
- In a large bowl, whisk together flour, salt, pepper, and fresh dill until evenly distributed. Let sit for 10 minutes.
- Add yeast mixture to the bowl and stir together using a rubber spatula just until combined.
- Cover and let rise somewhere warm until it has doubled in size, about 8-10 hours.
- Once the dough has doubled, pull it out onto a floured surface.
- Gently fold the dough into itself several times until it holds together, then stretch and smooth it into a rectangular shape and press Gouda cubes into the dough.
- Roll up the dough into a log shape, fold the ends underneath, and shape into a ball.
- Dust with flour, cover, and refrigerate overnight.
- Preheat the oven to 450ºF (232ºC) with your Dutch oven inside.
- Turn the dough out onto a floured surface seam side down, shape into a loaf, and place it on parchment paper.
- Score the top of the loaf with a razor blade or sharp knife.
- Remove the Dutch oven, transfer the dough with parchment into it, cover, and bake for 30 minutes.
- Remove the cover and bake for an additional 15-20 minutes until browned.
- Lift the bread from the Dutch oven using parchment and transfer it to a wire cooling rack to cool for up to an hour before slicing.
Notes
- Allow for adequate rising time to achieve the best texture.
- Ensure the water temperature is correct for yeast activation.
- Prep Time: 15 minutes
- Cook Time: 45 minutes
- Category: Bread
- Method: Baking
- Cuisine: European
Nutrition
- Serving Size: 1 slice